Flash OpenWRT on your ASUS RT-AX53U router
ASUS RT-AX53U is a dual-band 802.11ax (WiFi 6) and OpenWRT compatible router. Before you can start the SW flashing, you need to do a little HW hacking which is described here in details.
HW setup
After following the guide above your HW setup should look like this:
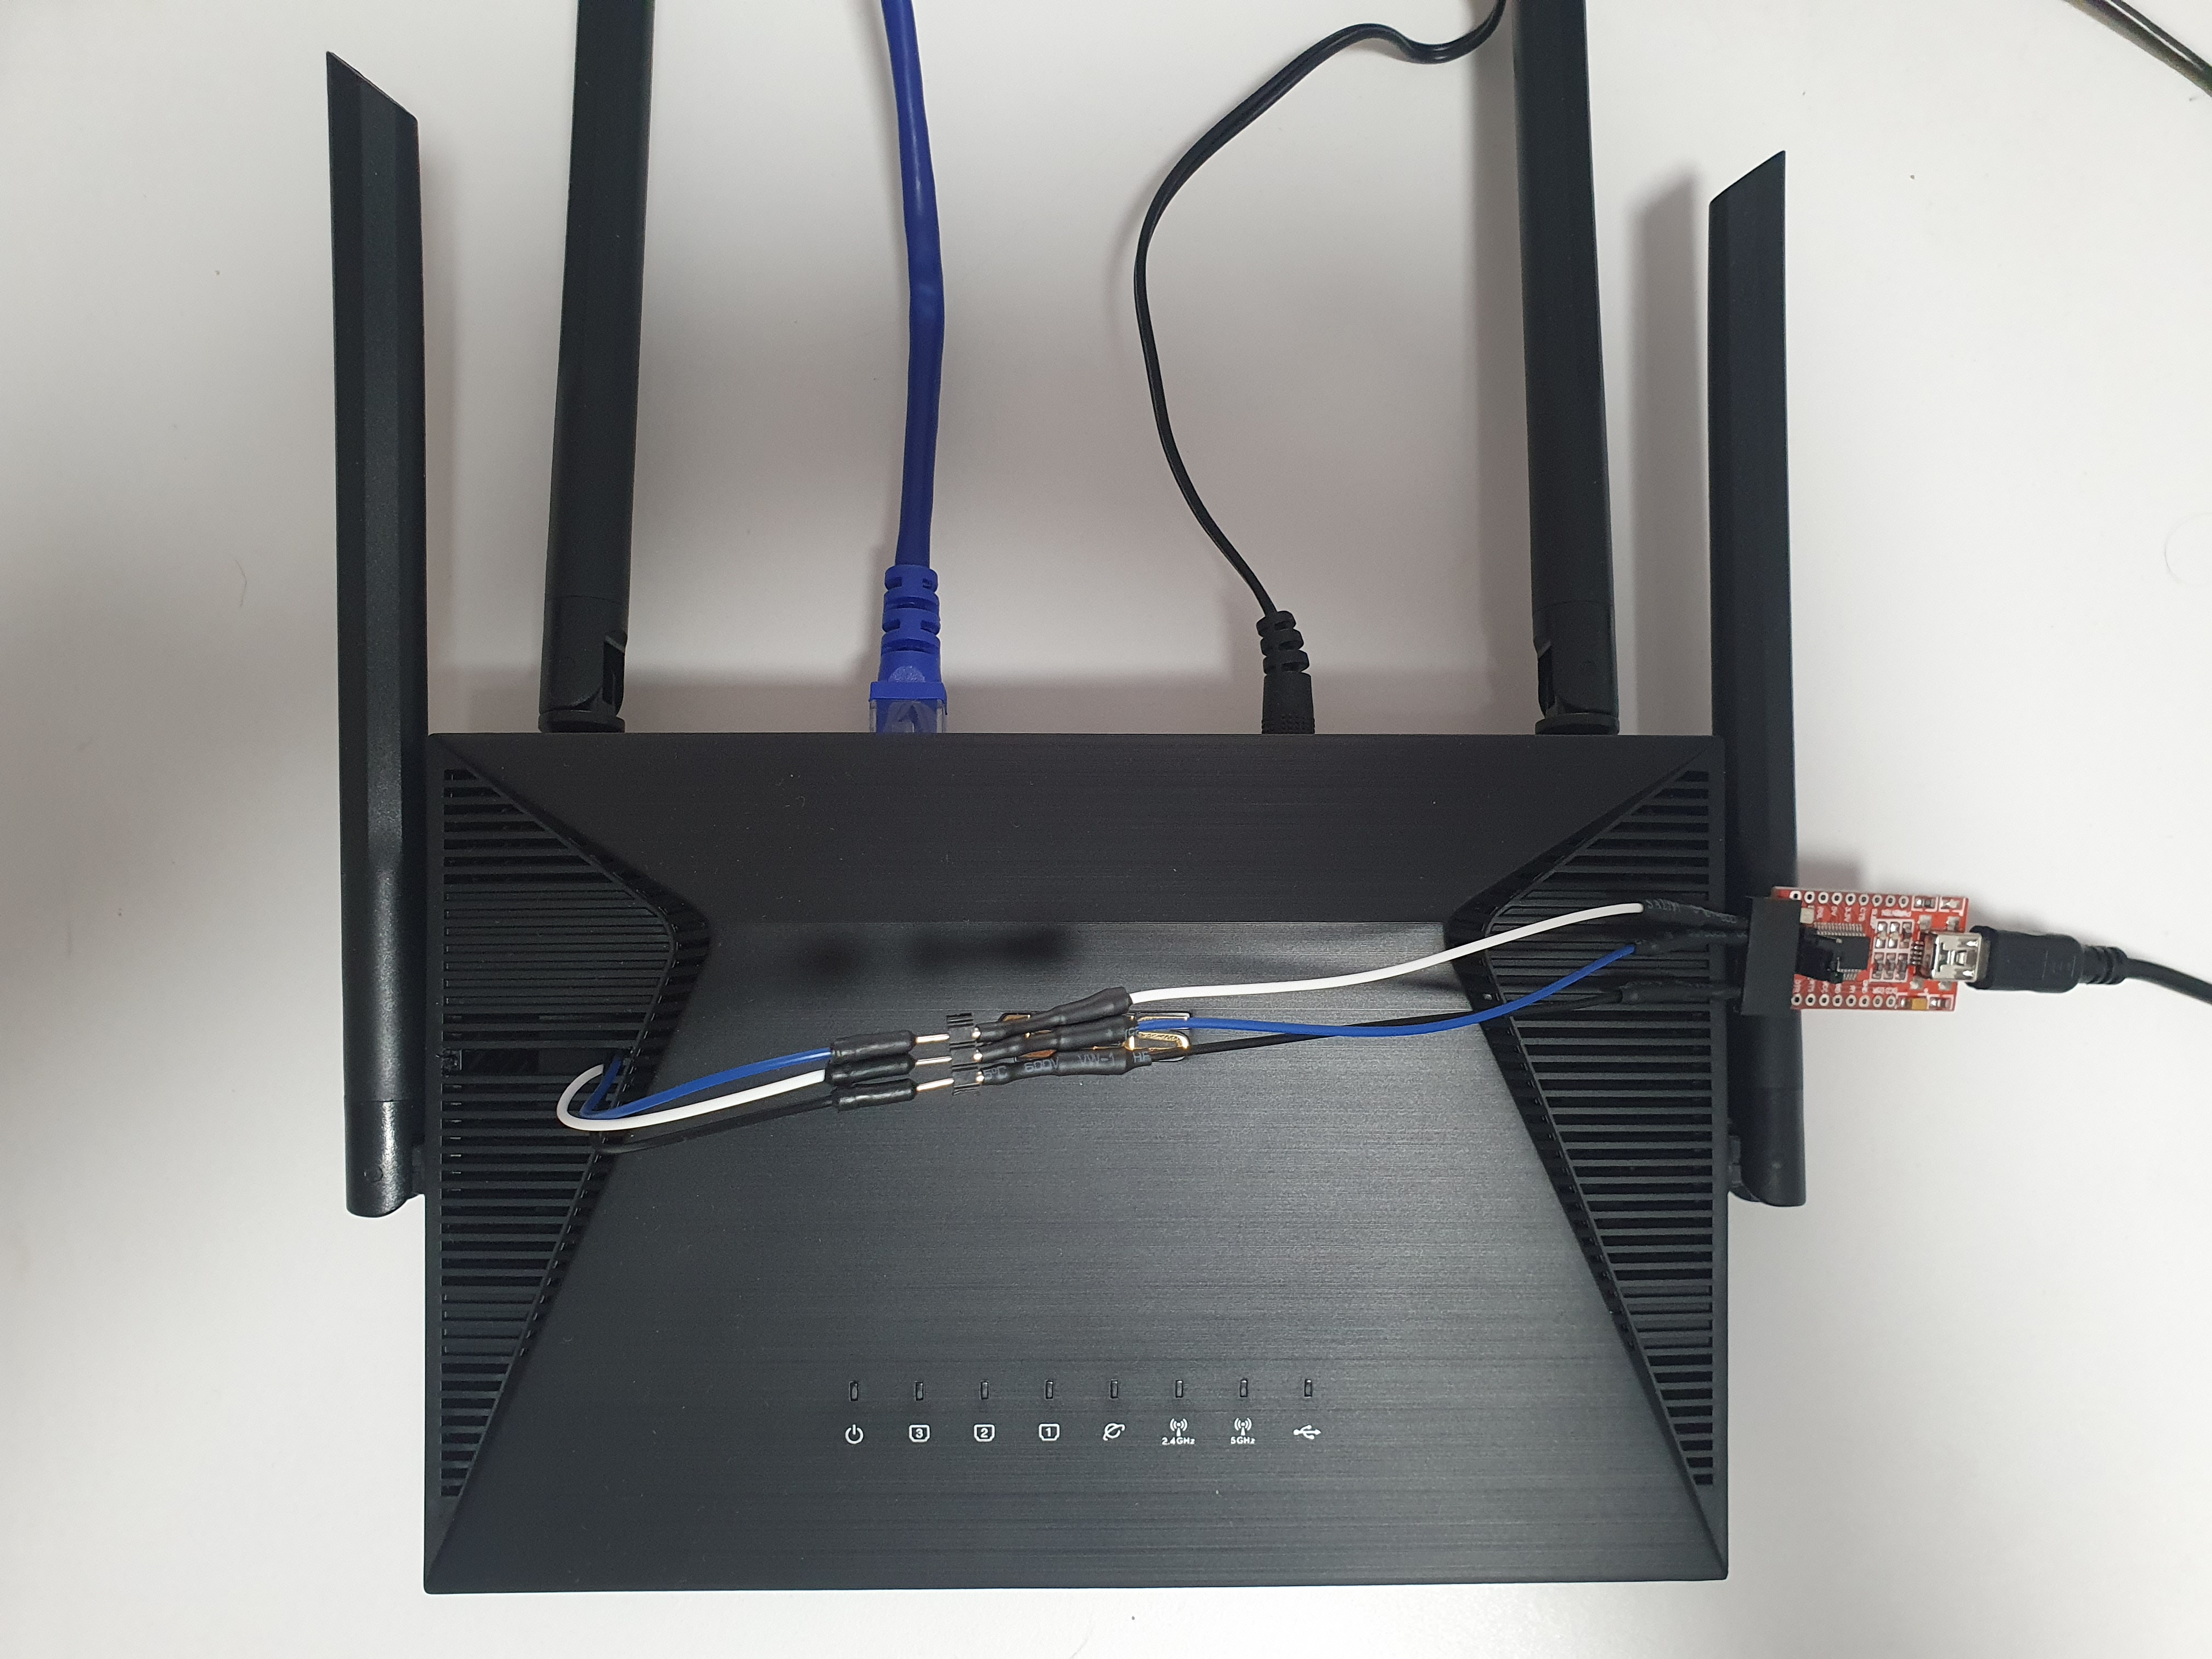
where:
- LAN1 port of your router is connected to your PC
- USB to serial UART adapter is connected
- to RX, TX and GND pins on the router side
- to USB on the PC side
- router power supply is connected to an outlet
Note: I am using an FT232RL based adapter.
SW setup
Set your PC IP to 192.168.1.2 (you can follow this guide).
Set up a TFTP server on your PC (for this one I used Windows 11 but you can use Linux as well, see my other guide):
- download and install Tftpd64
- download the OpenWRT image
- start the TFTP server
- from the dropdown menu of “Current Directory” select the folder containing your OpenWRT image
- from the dropdown menu of “Server interfaces” select 192.168.1.2
- test our TFTP server
- open
cmd.exe - execute
tftp -i 192.168.1.2 get openwrt-22.03.5-ramips-mt7621-asus_rt-ax53u-squashfs-factory.bin - you should see a similar message:
Transfer successful: 9568256 bytes in 2 second(s), 4784128 bytes/s
- open
Please ensure that your firewall rules are updated to allow TFTP traffic. While some may suggest temporarily disabling the firewall, this is not recommended for security reasons. This will be necessary when the router (TFTP client) will try to reach your PC (TFTP server).
Now that the TFTP server is running you need to run a serial console (my personal preference is PuTTY). You can find the COM port number by navigating to Device Manager –> Ports (COM & LPT). Set the baudrate to 115200, you can keep the other default settings.
Firmware update
You can now power on your router. You should see the boot messages in your serial console. You need to press a key when you see this line to stop the boot process:
Hit any key to stop autoboot: 3
Now you can upgrade the firmware:
Hit any key to stop autoboot:  0

  *** U-Boot Boot Menu ***

     1. Startup system (Default)
     2. Upgrade firmware
     3. Upgrade bootloader
     4. Upgrade bootloader (advanced mode)
     5. Load image
     0. U-Boot console


  Press UP/DOWN to move, ENTER to select

*** Upgrading Firmware ***

Run firmware after upgrading? (Y/n):

Available load methods:
    0 - TFTP client (Default)
    1 - Xmodem
    2 - Ymodem
    3 - Kermit
    4 - S-Record

Select (enter for default): 0

Input U-Boot's IP address: 192.168.1.1
Input TFTP server's IP address: 192.168.1.2
Input IP netmask: 255.255.255.0
Input file nameopenwrt-22.03.5-ramips-mt7621-asus_rt-ax53u-squashfs-factory.bin
If there is something wrong with your TFTP connection you will see a timeout:
Using eth@1e100000 device
TFTP from server 192.168.1.2; our IP address is 192.168.1.1
Filename 'openwrt-22.03.5-ramips-mt7621-asus_rt-ax53u-squashfs-factory.bin'.
Load address: 0x83000000
Loading: T T T T T T T T T T T T T T T T T T T T T T T T T
Retry count exceeded; starting again

*** TFTP client failure: -110 ***
*** Operation Aborted! ***
Otherwise the upgrade will finish successfully:
Using eth@1e100000 device
TFTP from server 192.168.1.2; our IP address is 192.168.1.1
Filename 'openwrt-22.03.5-ramips-mt7621-asus_rt-ax53u-squashfs-factory.bin'.
Load address: 0x83000000
Loading: T #################################################################
         #################################################################
         #################################################################
         #################################################################
         #################################################################
         #################################################################
         #################################################################
         #################################################################
         #################################################################
         #################################################################
         ##
         3.1 MiB/s
done
Bytes transferred = 9568256 (920000 hex)

*** Loaded 9568256 (0x920000) bytes at 0x83000000 ***


Erasing from 0x3e0000 to 0xcfffff, size 0x920000 ... OK
Writting from 0x83000000 to 0x3e0000, size 0x920000 ... OK

*** Firmware upgrade completed! ***

Error: no Image found at offset 0x003e0000
Error: no Image found at offset 0x003e0040
After doing a power reset your router will load the OpenWRT firmware. You can check the boot logs (and open LuCI at 192.168.1.1):
Reading from 0x1e0000, size 0x100000
Succeeded

RT-AX53U bootloader version: 1.0.0.1
Reading from 0x1e0000, size 0x100000
Succeeded
MAC Address: C8:7F:54:E1:96:98
Reading from 0x1e0000, size 0x40000
Succeeded
Check Factory's EEPROM successfully! (r = 17)
Reading from 0x2e0000, size 0x40000
Succeeded
Check Factory2's EEPROM successfully! (r = 17)
Reading from 0x3e0000, size 0x2000
Succeeded
Reading from 0x3e0000, size 0x298a02
Succeeded
   Image Name:   MIPS OpenWrt Linux-5.10.176
   Image Type:   MIPS Linux Kernel Image (lzma compressed)
   Data Size:    2722242 Bytes = 2.6 MiB
   Load Address: 80001000
   Entry Point:  80001000
   Verifying Checksum ... OK
## Booting kernel from Legacy Image at 83000000 ...
   Image Name:   MIPS OpenWrt Linux-5.10.176
   Image Type:   MIPS Linux Kernel Image (lzma compressed)
   Data Size:    2722242 Bytes = 2.6 MiB
   Load Address: 80001000
   Entry Point:  80001000
   Verifying Checksum ... OK
   Uncompressing Kernel Image ... OK
References:
- https://openwrt.org/toh/asus/rt-ax53u
- https://forum.openwrt.org/t/openwrt-support-for-asus-rt-ax53u/124053